

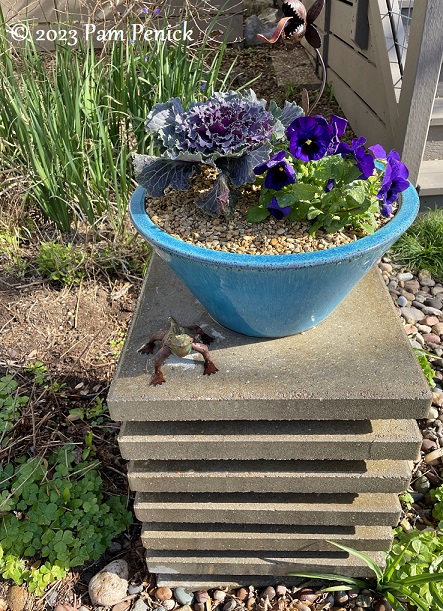
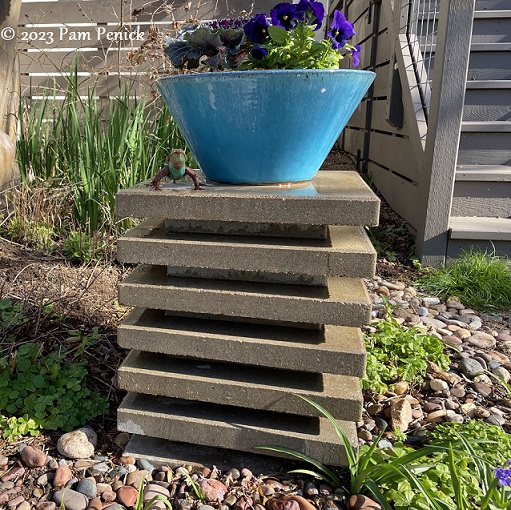
Make a stacked paver pedestal for your garden
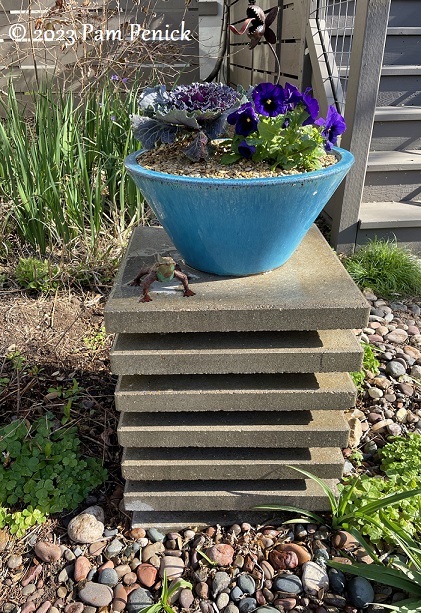
Need an inexpensive yet eye-catching pedestal to show off a container or elevate a piece of garden art? Get some concrete pavers in two different sizes, and stack them in alternating layers to create a contemporary plinth.
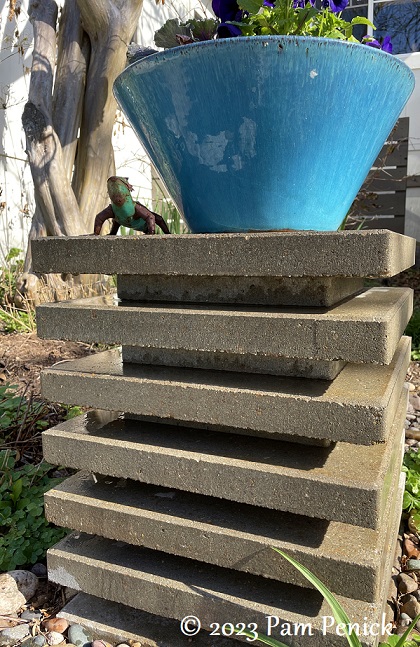
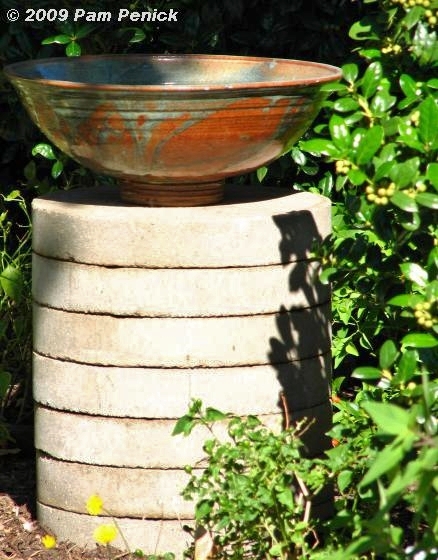
I made this one using 12-inch and 18-inch square pavers. I’ve noticed lizards basking on the sun-warmed pavers, partly sheltered by the overhangs. Lizard habitat and a display space? Win-win! My metal lizard has new friends.
Before you stack your pavers, take the time to make a sturdy, level foundation. Excavate about 8 inches, digging a hole a bit wider than your largest paver. Spread several inches of paver base or decomposed granite, and use a tamper to pack it into a solid, level base. Stack a couple of pavers and use a level to check that there’s no lean. If there is, remove the pavers and add more base material and retamp it. Make sure it’s dead level before stacking your pavers to the desired height.
Use concrete adhesive on each layer for added stability, if desired. If you have young kids or grandkids who might be tempted to climb it, keep it low and/or use one size of paver for extra stability.
I’ve seen variations of stacked-paver pedestals in numerous gardens over the years. Here’s one made of round pavers in the late Eleanor Pratt’s garden in Austin. An article in Midwest Living shows a variation on this design using two different sizes of round pavers. And somewhere I have a photo of a spiral plinth made of stacked square pavers, each one set at a slight turn from the one below.
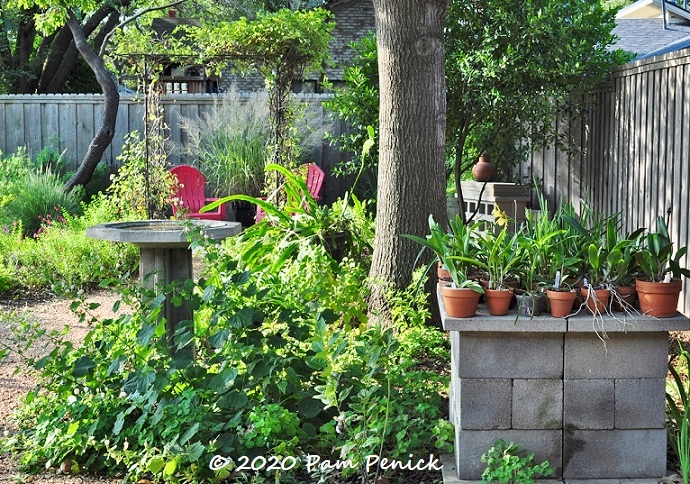
Bigger plinths can be made from stacked concrete blocks with pavers on top, like this orchid display table in Michael McDowell’s garden in Plano.
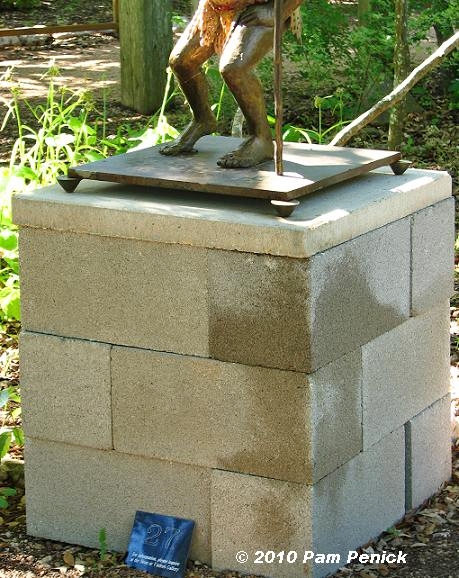
Here’s another one, for displaying a work of sculpture, at the Lady Bird Johnson Wildflower Center a number of years ago.
The humble concrete paver can be put to work for much more than paths and patios. Get creative with them to achieve some elevation in your garden and showcase a piece of art, a birdbath, or a planter.
I welcome your comments. Please scroll to the end of this post to leave one. If you’re reading in an email, click here to visit Digging and find the comment box at the end of each post. And hey, did someone forward this email to you, and you want to subscribe? Click here to get Digging delivered directly to your inbox!
__________________________
Digging Deeper
Experience the Surreal Garden at Zilker Botanical Garden, an enchanting neon-art display throughout the gardens, with food and drink, music and dancing, surreal performers, and interactive art sculptures. Surreal costumes encouraged! 25% of event proceeds benefit the Zilker Botanical Garden Conservancy. Runs April 6 (VIP Night), April 7-8, and April 13-15, from 6:30 pm to 11 pm.
Come learn about gardening and design at Garden Spark! I organize in-person talks by inspiring designers, landscape architects, authors, and gardeners a few times a year in Austin. These are limited-attendance events that sell out quickly, so join the Garden Spark email list to be notified in advance; simply click this link and ask to be added. Season 8 kicks off in fall 2024. Stay tuned for more info!
All material © 2025 by Pam Penick for Digging. Unauthorized reproduction prohibited.
Such a great idea, and they’re moveable, too! I’m finding that with the weird sun-partial sun-shade conditions I have here, that moveable planters can be so helpful. 🙂
I should build one like yours, if just for the benefit of the lizards! I found one poor guy clinging to the kitchen window screen for 2 days when the rain and the cold was at its worst. I wasn’t sure where to move him if I attempted a rescue but he survived to scamper away when the sunshine returned 🙂
I love this idea, and it’s fairly simple. I’m filing this away for future use.
Thanks for these DIY directions, Pam. I was delighted with this handsome structure when I saw it in your post a few days ago. Definitely going to construct one (or more) in my garden.
Lots of clever items here, made with inexpensive materials. Win/win!
Really love this idea!
I love this. Thanks Pam
Love Love Love!!
I had some older pavers that I stacked to elevate a planter: waste not, want not is what I say.
Michael McDowell’s orchid display table will perform well as a fern table in my neck of the woods (PNW). I was charmed by the photo of manhole covers, stacked 5 high: an inspiring idea for a raised bed!
Great ideas!
His reminds me of a Dutch gardener Mien Ruys. She loved using precast concrete blocks and pavers.
https://www.tuinenmienruys.nl/en/168/mien-ruys-1
Here are some photos from my trip in 2016.
http://mug-mike.blogspot.com/2016/08/tuinen-mein-ruys-netherlands.html
This is a great idea! Thanks for sharing the photos and directions.
I asked a neighbor for a stack of bricks left over from their add on to their house. They had set there for years. I have set them as plinths by themselves and added a concrete stepping square or even round with them. I seem to move my plinths far too often to get them set as good as you do. ha… I love the idea of lizards using them. I only have a metal lizard in my garden. Maybe some day they will make their way into our garden.