

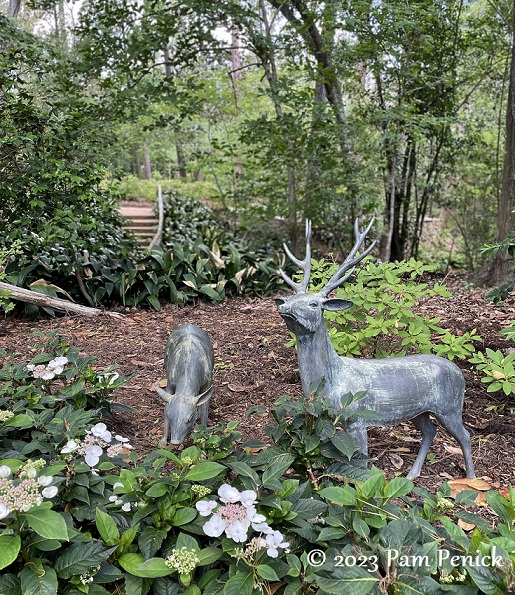
Another fall walk and deer destruction at home
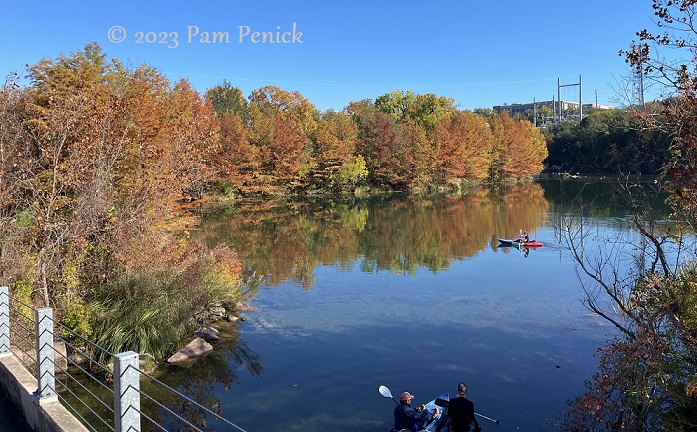
November 29, 2023 Beautiful fall weather enticed me and DH out for another walk around Lady Bird Lake last weekend, but first we stopped at Red Bud Isle to check out the bald cypresses going rusty orange. It’s a good show for Austin! Kayakers and canoeists were enjoying it too ...
Majestic mountains, wildlife, and Mormon Row at Grand Teton
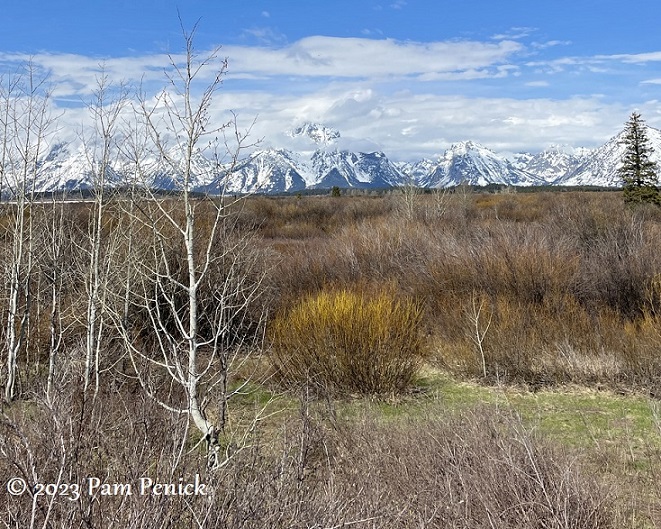
August 24, 2023 During our RV road trip across the West, we visited Grand Teton National Park in northwestern Wyoming, a majestic place where blue, snow-streaked mountains rake the sky above a scenic valley. The Teton Range was formed along a fault line, where, 10 million years ago, colliding tectonic ...
Moose, goose, grizzlies, and more Yellowstone wildlife, part 3
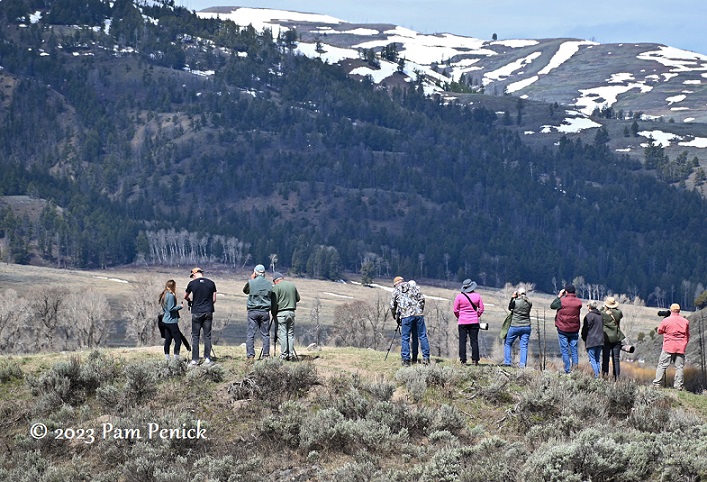
August 17, 2023 Yellowstone National Park was my favorite of all the parks we visited during our spring RV trip through the West. Why? Because the wildlife-watching there is epic! That’s my favorite thing to do, far more than hiking, which I’m always a little nervous about in grizzly country ...
Waterfalls, wildlife, and wonder at Zion National Park
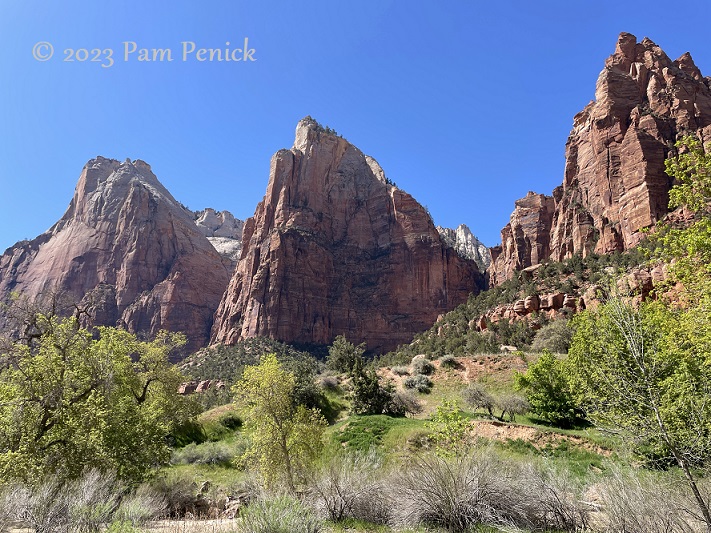
June 21, 2023 Utah and its wealth of national parks drew us west on our 5-week RV trip this spring. Zion National Park in southwestern Utah sparkles as one of its crown jewels. For anyone wishing to beat the heat in canyon country, April is prime visiting season. We arrived ...
Ima Hogg’s Bayou Bend garden is preserved in time
June 05, 2023 Back in April, work took me to Houston. While there, I stepped back in time with a visit to Bayou Bend, the formal estate garden of Houston socialite, art collector, and philanthropist Ima Hogg. The daughter of a Texas governor with terrible baby-naming skills, Ima shouldered the ...
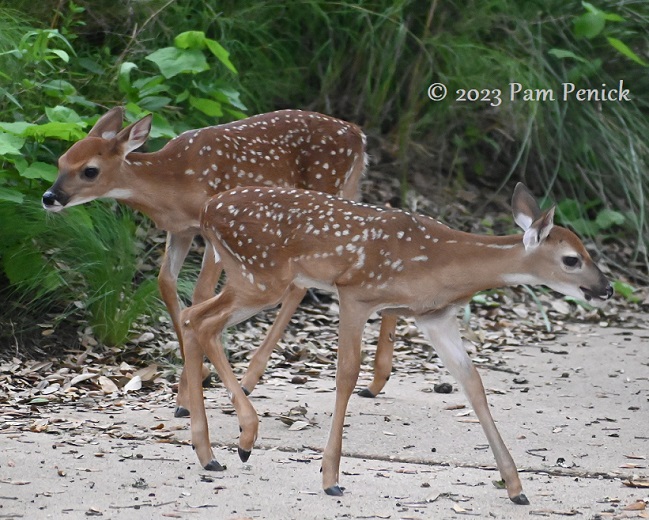
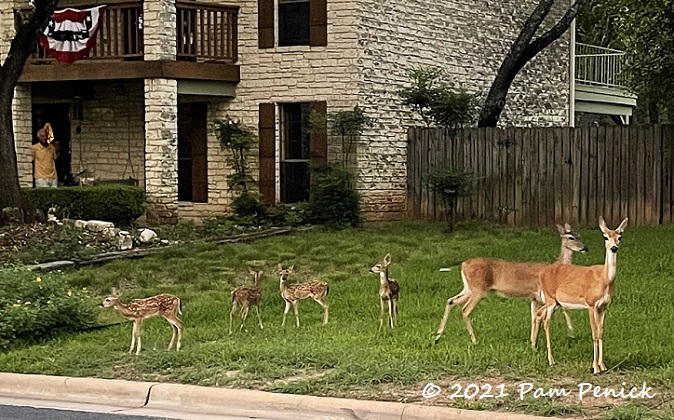
Fawns welcome me home
May 29, 2023 Did you notice it’s been a little quiet around here? If you follow my Instagram, you already know I joined my husband this spring on a 5-week RVing trip to see national parks in Utah, Colorado, Wyoming, Montana, and the Dakotas. (Find my Instagram stories about the ...
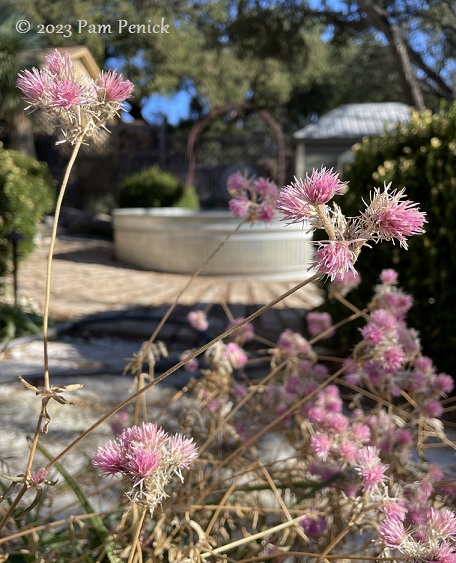
Late-winter flora and fauna on my 17th blogiversary
February 14, 2023 ‘Fireworks’ gomphrena gone to seed On Valentine’s Day 2006 I hit publish for my very first blog post. Back then I saw blogging as a way to document my garden through the seasons and to join the online conversation about gardening in Austin. Boy, was it ever! ...
Enjoying fall color and a mellow garden
December 07, 2022 By the time I hang red Christmas balls from the agave’s spines, the Japanese maple finally blushes red too. Fall comes late to Central Texas, but I’ll take it, even at Christmastime. Last week was peak color for the Acer palmatum. Today, shriveled tan leaves cling to ...

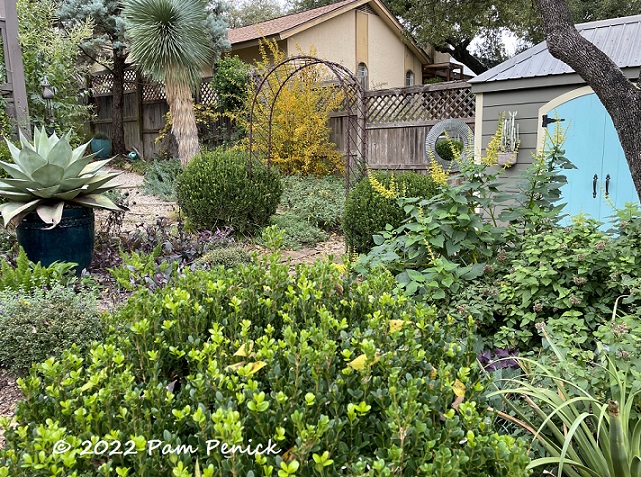
Spotlight around the garden
November 09, 2022 Before Halloween I took a few photos of whatever caught my eye, starting with the whale’s tongue agave in the tractor-rim planter. Hello, gorgeous! Somebody is watching me from the far end of the Berkeley sedge lawn. Hello, deer. Oh, and the Wheeler’s sotol that replaced the ...
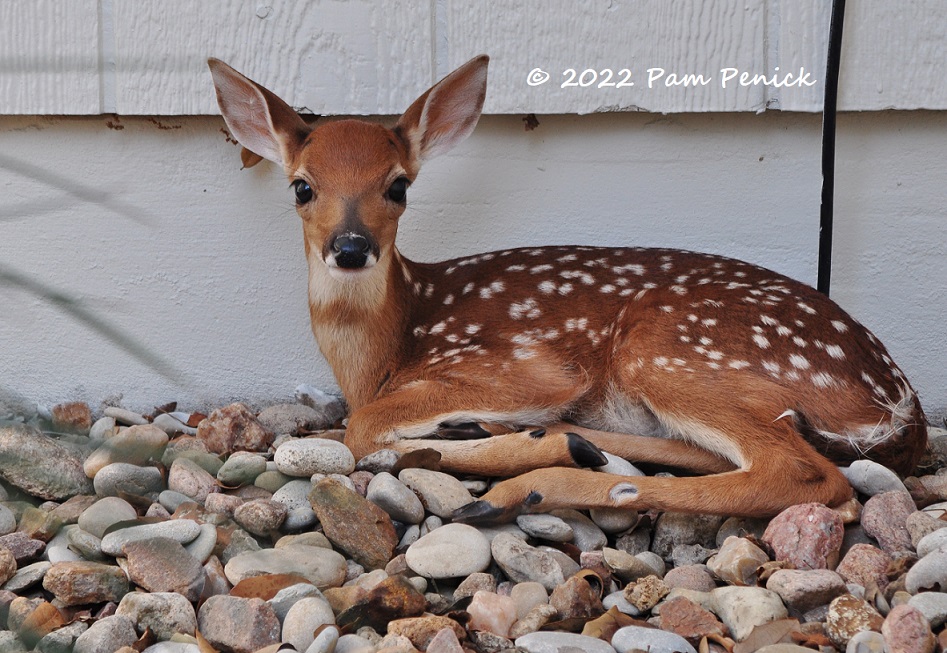
My garden is a fawn nursery
May 27, 2022 Suddenly they’re everywhere. The deer? No, they’re always here, passing through my garden and neighbors’ yards at dusk, at night, in early morning. But starting in mid-May, the does give birth. They stash their tiny fawns in a hiding place — under a bush, behind a potted ...
Wild things living in my garden
July 14, 2021 A month ago I spotted twin newborn fawns in my front garden. They’re still out there most days, only they’re much bigger now and will take flight rather than crouch and hide. The bold one watches warily if we come outside while it’s enjoying an evening lie-down ...
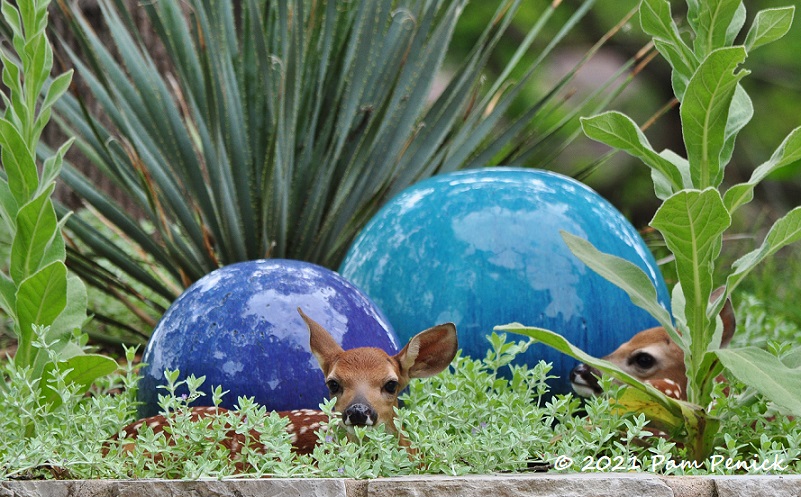
Twin fawns hiding in the garden
June 16, 2021 Opening the front door, I spotted four oversized ears and two white-spotted bodies — twin fawns hidden by their mother in the raised bed by the driveway. Framed against shiny, blue ceramic balls, they made an irresistible photo op. I quietly staked out a spot on the ...

Bee balm, daylilies, and fawn season
June 13, 2021 I’m grateful for the past two weeks of off-and-on rain, which helped my garden rebound from the epic February freeze. Early June may be hot and muggy now, but the garden is full and flowery. And the driveway border is back, baby! ‘Peter’s Purple’ bee balm (Monarda ...
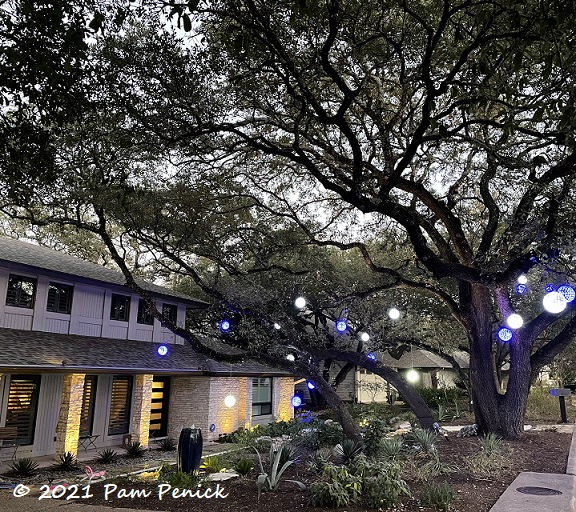
Glowing front-yard gardens, plus Fearless Gardening winner
January 16, 2021 On twilight walks around the neighborhood I love coming to this house, the home of neighbor friends who deck out their front-yard garden with hanging globes of blue and white for Christmas every year. I’m in no hurry for them to take them down. The lights add ...
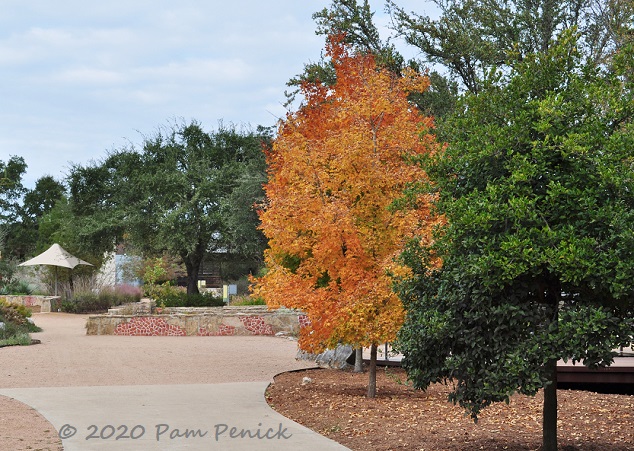
Bigtooth maples and more fall foliage at the Wildflower Center, part 2
November 19, 2020 Did a few bigtooth maples from Lost Maples Park lose their way and end up at the Lady Bird Johnson Wildflower Center? It sure looked that way last week, when I spotted pumpkin-spice trees in the Family Garden. This is part 2 of my tour. Big, colorful ...
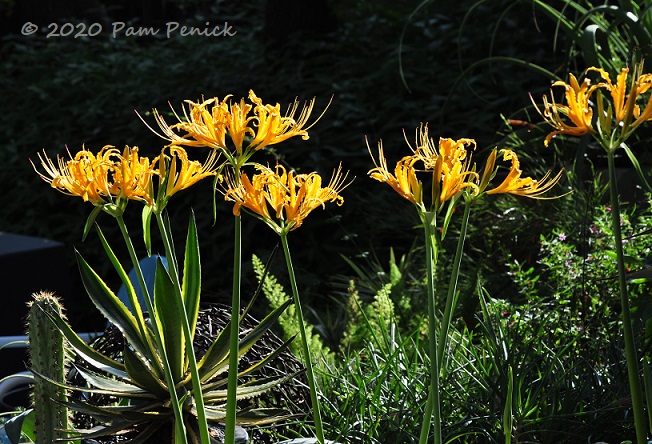
Autumn comes in yellow and purple
September 30, 2020 The yellow spider lilies (Lycoris aurea) are up 3 weeks earlier than last year, perhaps due to our cooler than usual early fall, and I am here for it. Each afternoon the sunlight slants under the live oaks and hits the lilies like a spotlight, an effect ...