

Gardens for adventure, art, and games at Paxson Hill Farm
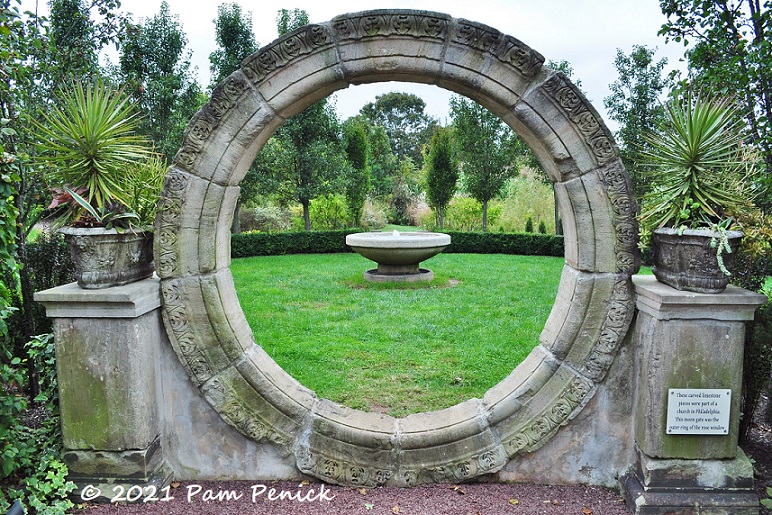
November 22, 2023 Picking up my tour of Paxson Hill Farm — from the Philadelphia Area Fling in September — where I left off yesterday, let’s keep exploring! After emerging from the hobbit house hideaway, I followed the path uphill through another weeping-tree arch. The romance! Am I right? The ...
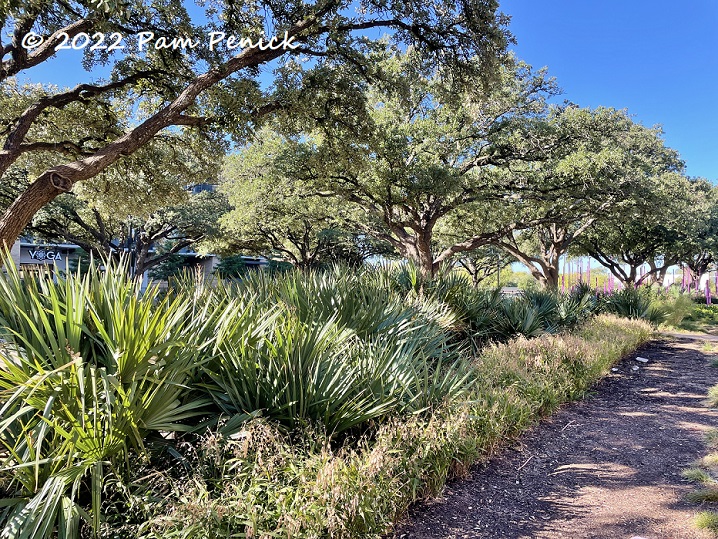
Native plant landscaping at ACC Highland Campus, the new home of Central Texas Gardener
October 26, 2022 Teri Speight doing a Central Texas Gardener studio taping Last week, when author Teri Speight was in Austin to give a Garden Spark talk, I accompanied her to a taping at the new Central Texas Gardener studio at Austin PBS. Producer Linda Lehmusvirta had announced CTG’s move ...
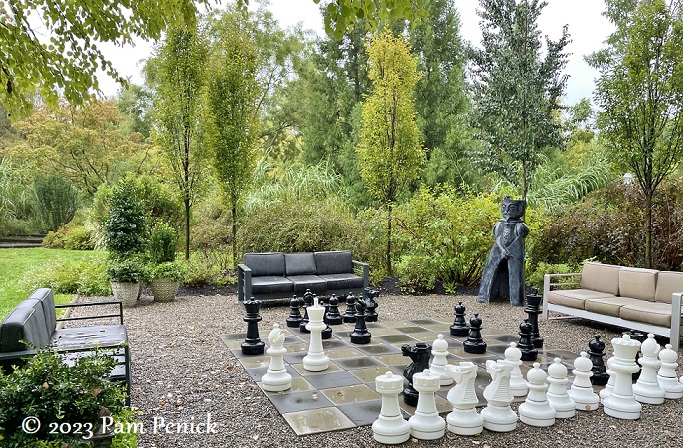
Gardens galore at Paxson Hill Farm, part 1
February 09, 2022 Paxson Hill Farm’s crossroads, where inviting paths branch in every direction A friend asked me how I find gardens to see when traveling. Aside from online research a lot comes down to asking gardeners who live in the area. And it pays to build in time for ...
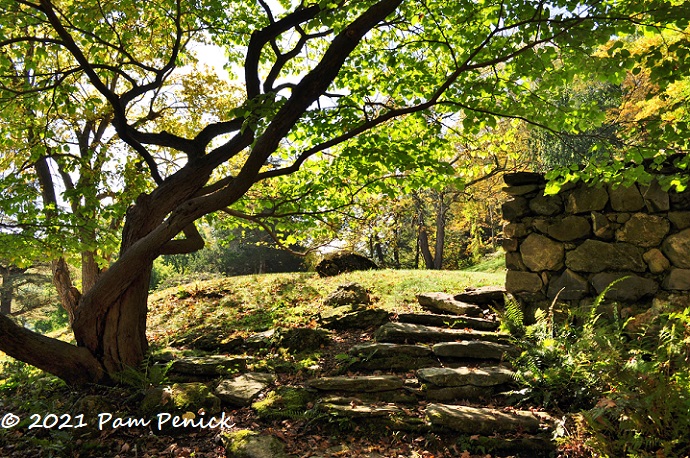
Fill up your cup at Innisfree Garden, part 1
December 08, 2021 “Pam, I hope you are planning a visit to Innisfree, the world’s greatest underrated and too little known garden.” So messaged James Golden of Federal Twist after I’d asked if I might visit his own increasingly well-known garden while on my Northeast road trip in October. As ...

San Antonio Botanical Garden reopening, part 1
May 19, 2020 After a month and a half self-isolating at home, I was craving a garden visit when I got the news that both the Lady Bird Johnson Wildflower Center and San Antonio Botanical Garden were opening back up at limited capacity. I immediately went online and secured tickets ...
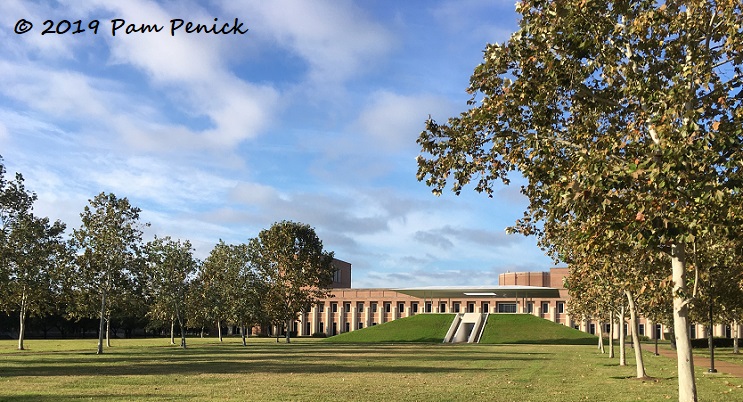
Sculpture worth visiting at Rice University
December 07, 2019 Rice University is my alma mater, and if the weather’s nice when I’m in Houston I’ll often take a walk around campus. It’s not all for nostalgia’s sake, though. Rather, Rice has really upped its sculpture game in recent years, and much of it is open to ...

Paris parks, pigeons, and masterpieces
June 28, 2018 After Venice earlier this June, we spent 5 nights in Paris, a city I hadn’t seen in 29 years. It is as beautiful and vibrant as I remembered. My husband took these twilight images from the top of the Arc de Triomphe, looking out over the city ...
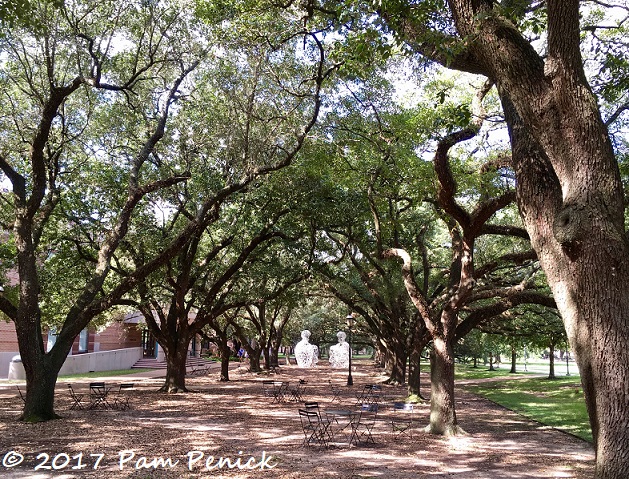
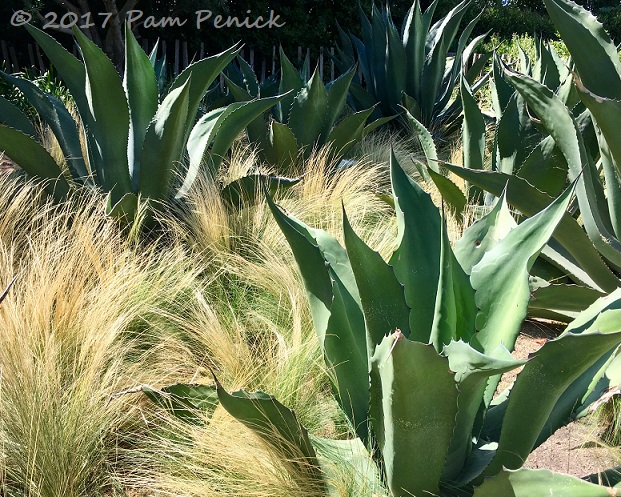
Foliage architecture (and art) on Rice University campus
October 16, 2017 At my alma mater in Houston last month (right after Hurricane Harvey), I appreciated the marriage of foliage and architecture at the Brochstein Pavilion, a remarkable structure and hub of student activity that didn’t exist when I was a student at Rice University. A hedge of tightly ...
Cornerstone Sonoma showcases conceptual gardens in scenic wine country
August 20, 2017 It wasn’t easy, but I finally visited the gardens at Cornerstone Sonoma in Northern California, which have been on my bucket list for years. Due to my own poor planning, I first missed them after the San Francisco Garden Bloggers Fling, when I rented a car to ...
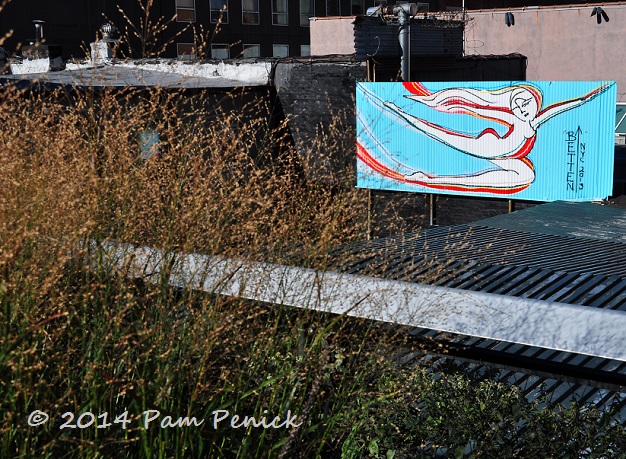
Up on the High Line, a skyline promenade
October 19, 2014 Have you ever flown across the country to see one garden? I did last weekend. Rapturous articles and blog posts about the High Line, New York City’s garden-park conversion of an abandoned elevated rail line through the city’s old Meatpacking District, had seduced me for 5 years ...

Perot Museum of Nature and Science plaza, frogs, and rooftop garden
October 06, 2014 Over the weekend we traveled to Dallas to visit our son at college and do a little sightseeing in Big D. We’d stared curiously at this Borg-like building from the highway through downtown Dallas on several previous visits, and this time we finally had a chance to ...
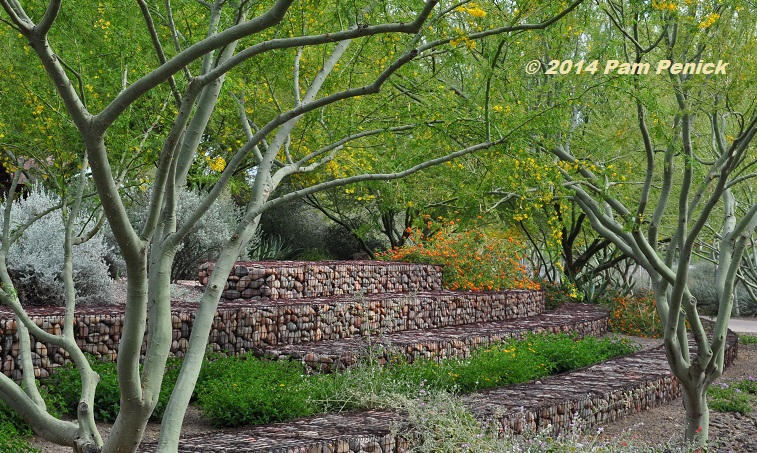
Xeriscape is not a zeroscape: Scottsdale Xeriscape Garden demonstrates the beauty of saving water
May 09, 2014 It’s a common mispronunciation, but it’s also a bit of a Freudian slip: saying “zeroscape” instead of “xeriscape.” To xeriscape is to design a garden that conserves water through the use of drought-tolerant plants grouped according to water needs, water-collection systems, mulch, non-wasteful irrigation, and other rather ...

Houston Open Days Tour 2014: West Lane Garden
April 07, 2014 The West Lane Garden, one of six private gardens on tour during the Garden Conservancy-sponsored Houston Open Days on March 29, is a showcase of contemporary design, which nicely complements the low-slung, renovated, mid-century modern house it frames. Organized around straight-line axes, with garden views that carry ...
Houston Open Days Tour 2012: Wolf Residence Garden
April 06, 2012 My next stop on the Houston Open Days tour on March 24 was an Old World-style home in the well-heeled River Oaks neighborhood. While their garden included the sweeping lawns, classic hedging, and emphasis on outdoor architecture commonly seen on this tour, I have to admit that ...