

Laying a stone path
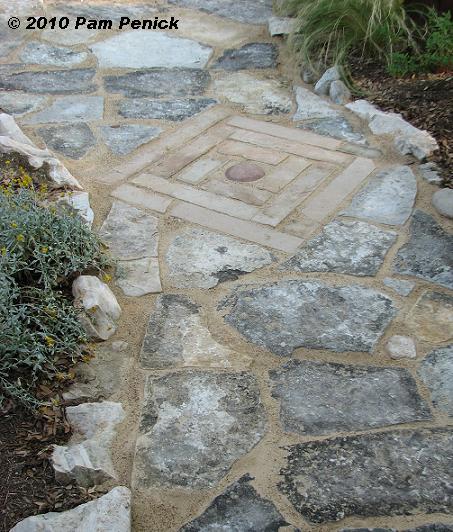
Having procrastinated on those grass paths in the back garden long enough, this weekend I hauled home two trunkloads of limestone pieces and got to work. Naturally, I ran out of stone while laying the path on Sunday, and I knew the stone yards would be closed through Tuesday. Meanwhile we have company coming over today, and I couldn’t leave it half-finished. So I used some of my leftover stone strips from the sunburst path around the stock-tank pond and made a diamond-shaped insert. A biscuit-like river rock in the middle is the finishing touch.
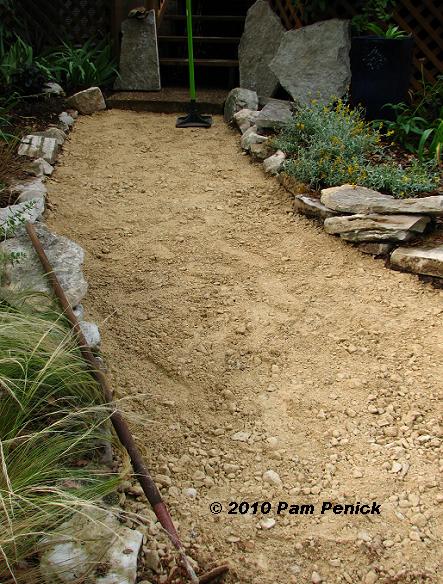
Making a path like this is pretty easy—meaning it doesn’t require a lot of technical skill, but it does require a strong back and plenty of sweat equity when temperatures are in the upper 90s (35.5 C). After digging out the grass, a chore I hired out, I spread 3-4 inches of paver base and used a tamper to compact it.
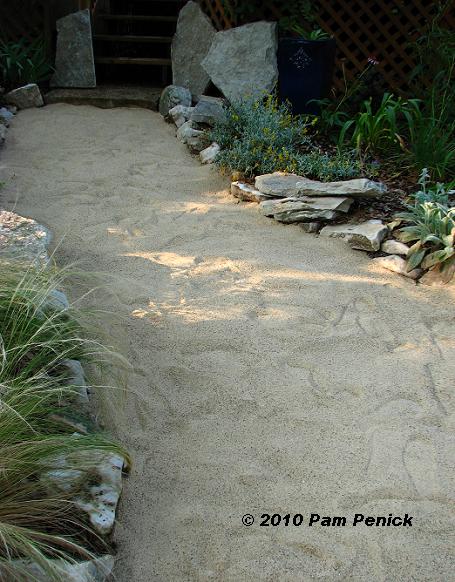
Then I put down a couple of inches of sand.
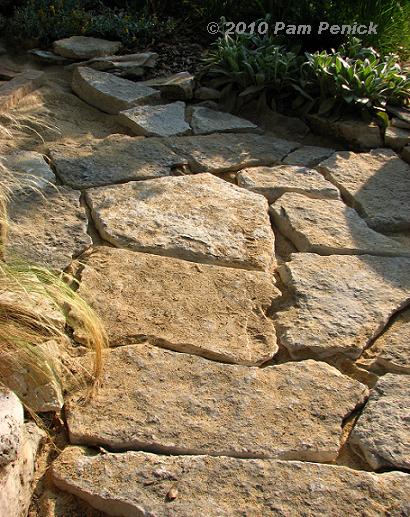
Next I laid the stone. It’s best to use stone that’s at least two inches thick when dry-laying (rather than mortaring) a walk; it’s less likely to lift up on one end when you walk on it. Fitting the stone together takes patience. It’s kind of like putting together a puzzle. I checked to make sure each piece was level with the others as I went along. An existing slope ensured that water won’t pool on the path when it rains; if the space had been flat, I’d have built in a slight slope.
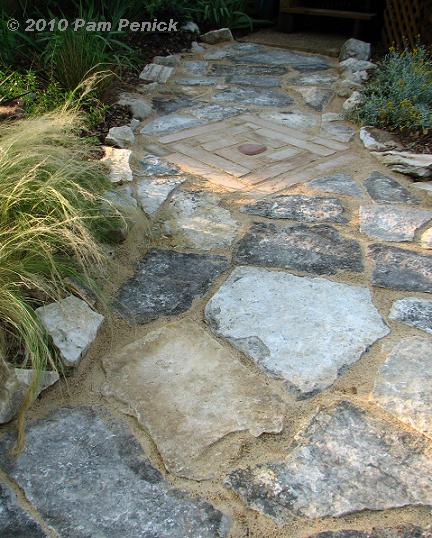
When the stone was laid and level, I swept sand across it and filled the cracks. That’s it.
I’m happy to have a firm, level path from the deck to the garden. Next up: the sloping side-yard path. There’s always another project.
All material © 2006-2010 by Pam Penick for Digging. Unauthorized reproduction prohibited.
Fabulous job Pam. Love the inset. What would we do without limestone “the bedrock of civilization” Your visitors will enjoy a much easier stroll to the lower garden.
Whew, I swear my back started to hurt just reading about all you did to make this path. “Sounds so simple”, and you are right, it is, it is just Hard Work. A tip of my gardening hat to you for a fabulous job!
As Monty Burns would say – Excellent, Excellent
You can be my Smithers anytime.
Yep, it’s kind of like putting together a puzzle but you don’t get a picture on the box, the pieces can crush a finger and when you’re finished you have trouble straightening your back.
I avoided crushing any fingers on this project, Wiseacre, but my back is sore and so are the muscles in my hands from gripping stone to move it. —Pam
Beautiful path!!! I’ve made pink limestone paths through my garden, so wow! I can appreciate your path. I love the insert.
golly! You make that look so easy! I know its a LOT of hard work. Your results are wonderful though. Can you give us a ballpark figure on how much that cost? (rock, sand, stones) DO take care of your back!
The rock cost right around $100 (I hauled it myself, so no delivery fee). The paver base (25 bags) was $90, and the sand (15 bags) was $50. So altogether about $250. —Pam
Just beautiful. The addition of the diamond made with leftovers is the jewel in the path. Isn’t it funny the way that necessity often brings a bit of unexpected beauty to our gardens.
I love it and think using the strips was inspired~and it echos the Sunburst beautifully….gail
Nice job. Glad to hear how its done. Looks like hard work, but so far experience has taught that any work in the garden is hard work!
Pam, your path is just gorgeous — and I had also missed your post about the sunburst around the stock tank. It is truly inspired. Well done, I’d say!
Necessity is the mother of invention. I think the diamond pattern inset is a great addition to the walk-way. It looks beautiful, and I can attest to the sore back and hands…I was rearranging stone edging this Spring and broke my pinkie finger.
What a great job, Pam, it looks fantastic. I love your creative problem solving skills!
The path looks great. I think your shortage problem, turned out to be an asset.
Was the stone from your usual stone yard, on 290? I need to do some research for some stepping stones. I’ve never bought any myself. The ones I have here, were brought in by the landscaper.
You’re inspiring.
Thanks, Linda. No, I didn’t go to my favorite stone yard, Daniel Stone, this time because I was in a hurry and needed someplace closer. So I went to Whittlesey in north Austin. —Pam
The path looks great and the diamond inset adds a lot of character. Quick thinking made the project even better – nice job!
Wow. You go girl! That’s some hard work and the path looks great. And isn’t it interesting how necessity really is the mother of invention? You had a hole to fill and got inspired!
Oh. Beautiful. I wish I had stone paths in place of all these grass paths, magically leveled and laid without effort on my part. I guess that means grass paths will continue here. I admire your grit, pun intended.
Beautiful stone work, Pam. Nothing more exciting than walking on a solid path that wasn’t there yesterday.
Great work, Pam. The insert makes the path even more *interesting*. 🙂 I would just say you planned it that way all along.
Pam, that looks fabulous! I agree, the insert adds interest. I’m impressed that you did all that work in such hot weather. Do you jump in the pool periodically to cool off? I swear it would be worth adding a small pool to my back garden just to be able to do that!
Yes, the pool is a lifesaver in this hot weather. I actually went in in my clothes at one point this weekend, as I was too hot to bother going inside to change into my swimsuit! If I didn’t have the pool, I’d have probably dived into the stock-tank pond or stood under a hose. Being wet is the key. —Pam
Love it!!! You are so creative and keep me inspired. I was wondering what to do with all my mismatched pieces of stones.
Just wondering how your hired help removed the grass. I am trying to work out how to keep the kikuyu grass out of my vegetable garden and doubt that even going back to subsoil will stop it!
Chookie, they dug it out with mattocks and left me with a clean, level surface to work with. It was St. Augustine grass, which is pretty easy to remove with no worries about it creeping back from severed root pieces. Bermuda grass, on the other hand…that’s much harder to get rid of, perhaps like your kikuyu grass. —Pam
Looks great, Pam! I love the insert, and I appreciate the info on the steps you took.
Your path is fabulous. Wish I had the gumption to dig mine up and start over!