

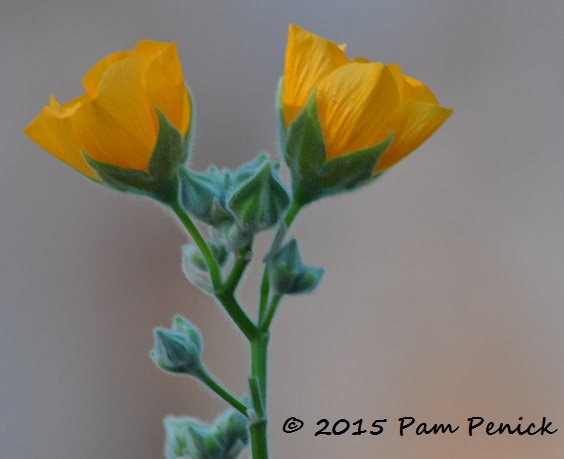
Mellow mallow on Monday
August 24, 2015 Mmmmm, I do love Indian mallow (Abutilon palmeri). Those velvety, lime-green leaves and stems! Those Creamsicle-orange cupped blossoms! Its soft-orange flowers pop against cobalt blue. Its pettable green leaves soften the blue stucco wall in the back garden, unfazed by blasting sun and heat. Mmmm, mellow mallow ...
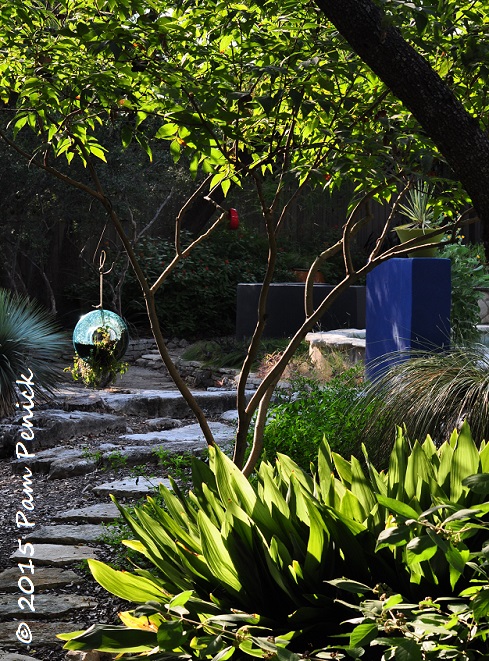
Stained-glass leaves and Crazy Eyes snake
August 22, 2015 Even a dark-green, fibrous leaf, like that of cast-iron plant (Aspidistra elatior), glows like a stained-glass window when backlit by the setting sun. In the lowest, shadiest part of my garden, it fringes a native Mexican buckeye (Ungnadia speciosa), which is also aglow. A tunnel of incandescent ...
The garden knows summer is slipping away
August 20, 2015 As yet another long, hot Austin summer drags on, with no real relief expected until early October, I start combing the garden for signs of a change in season. Late yesterday afternoon I found quite a few — hallelujah! The dangling seedheads of inland sea oats (Chasmanthium ...
Tough August survivors for Foliage Follow-Up
August 16, 2015 Mexican honeysuckle adds leafy lushness in the dappled shade of live oaks and is flowering to boot. Its companions include Mexican weeping bamboo, Agave colorata, foxtail fern, and Pennisetum purpureum ‘Vertigo’. These are “the bitter days in the garden,” according to West Texan Susan Tomlinson, who blogs ...
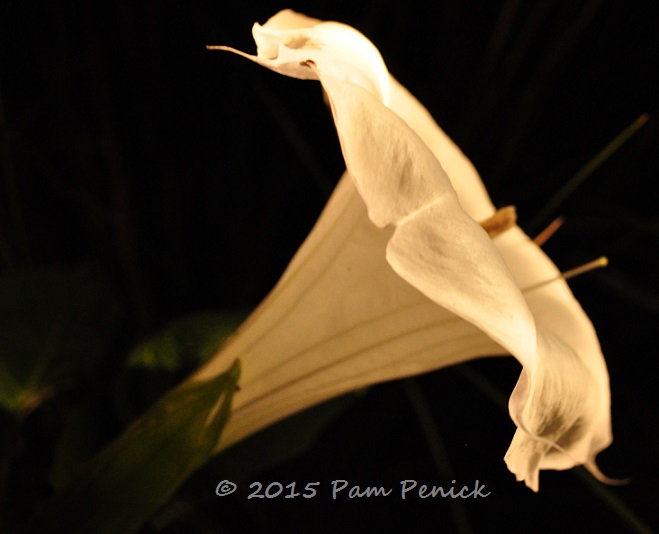
Night-blooming datura glows in the moonlight garden
August 15, 2015 Around midnight, at the witching hour, I asked my daughter if she wanted to go out and see if the datura (D. wrightii) was blooming. “Yes!” she said, jumping to her feet. “That’s my favorite plant.” Well, OK then! We slipped on our sandals, grabbed a flashlight, ...
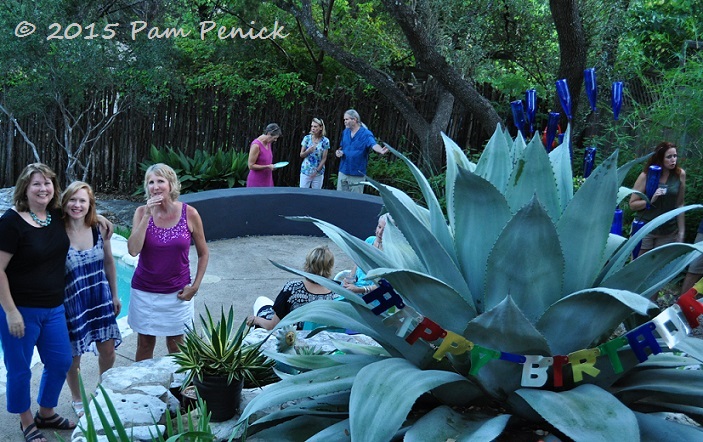
Moby turns 10 amid tequila party fanfare
August 10, 2015 Only one plant in my garden has earned a name. You know who I’m talking about, right? Moby, my beloved Whale’s Tongue agave (A. ovatifolia), just turned 10 years old. That is to say, I’ve had him for 10 years — 7 years in my current garden, ...
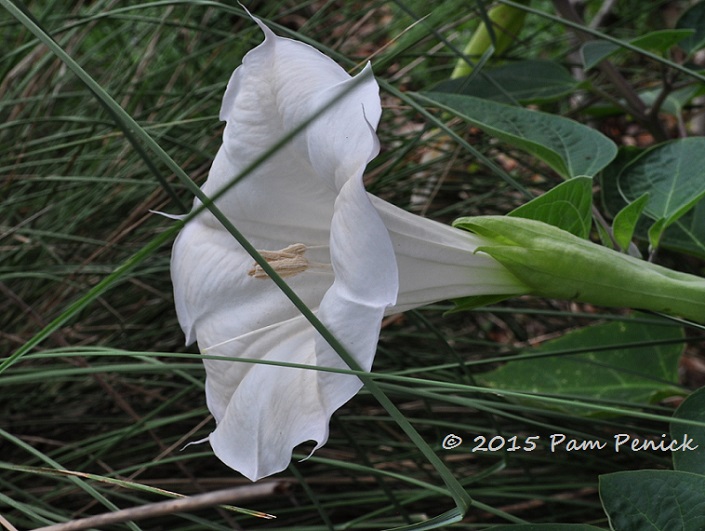
X marks the datura
August 07, 2015 As the day’s blistering heat slowly ebbs, datura (Datura wrightii) unfurls its white trumpets and scents the evening air. Plants I can enjoy at dusk or dawn help get me through the depths of an Austin summer. All material © 2006-2015 by Pam Penick for Digging. Unauthorized ...
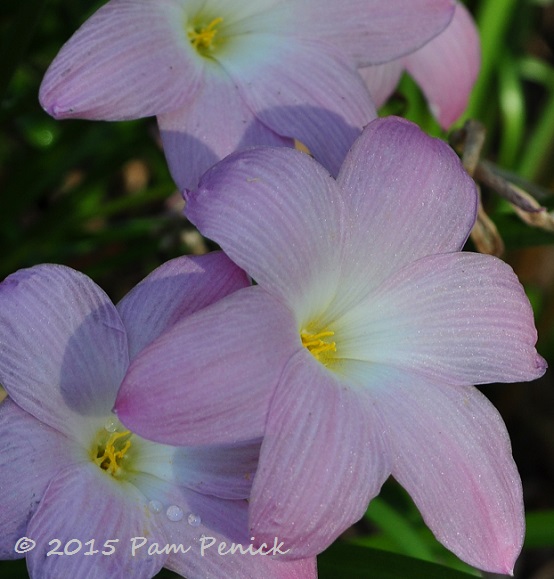
Rain lilies abloom high and low
August 04, 2015 No rain for a month, but my rain lilies (Zephryanthes ‘Labuffarosea’) have decided enough is enough, and they’re blooming anyway. After weeks of hunkering down inside with the A/C, I spent the last two days outdoors, in 100-degree heat, cutting back tired or overgrown perennials, trimming plants ...
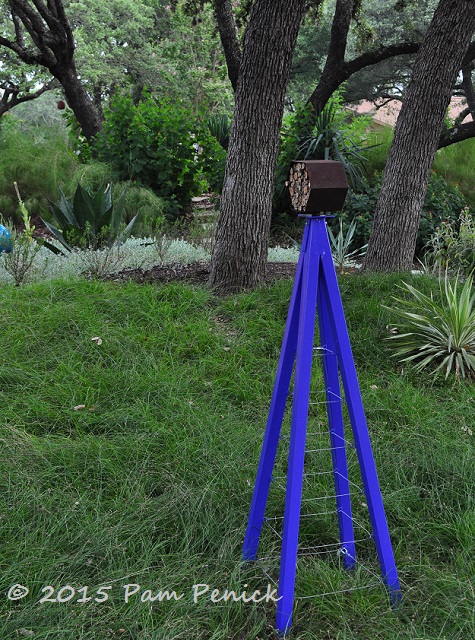
New blue tuteur doubles as bee B&B
August 02, 2015 The sea of green that is my deer-resistant sedge lawn and grassy borders now has a welcome shot of color. When I heard that TerraTrellis, a woman-owned, original-garden-art studio in Los Angeles, was running an online sale, I splurged on their Akoris Jr. tuteur with a bee ...
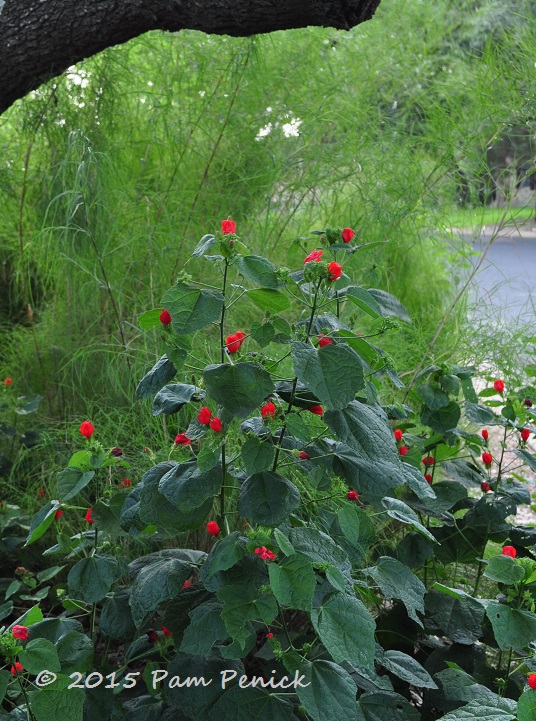
Plant This: Turk’s cap
July 21, 2015 Death Star-adapted plants tend to be small-leaved and airy, the better to retain precious water. But our native Turk’s cap (Malvaviscus arboreus var. drummondii) defies that expectation with vaguely heart-shaped leaves the size of a napkin scrounged out of your car’s glove box, and just as crinkled ...
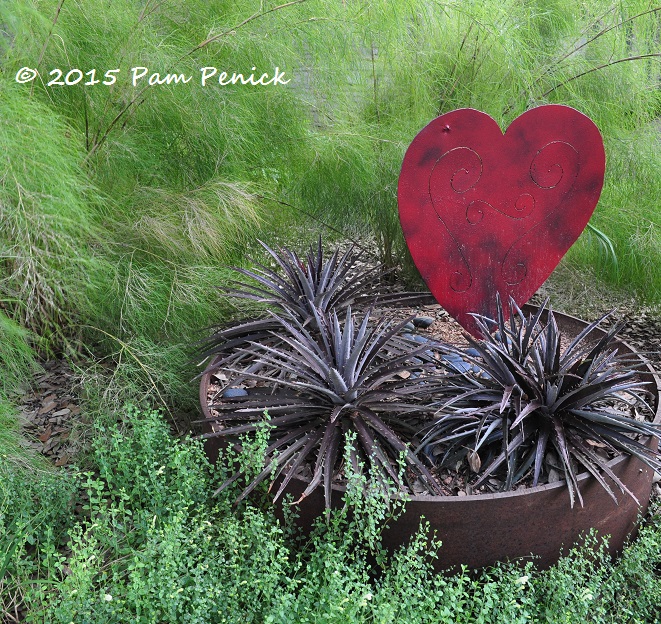
I heart foliage! July Foliage Follow-Up
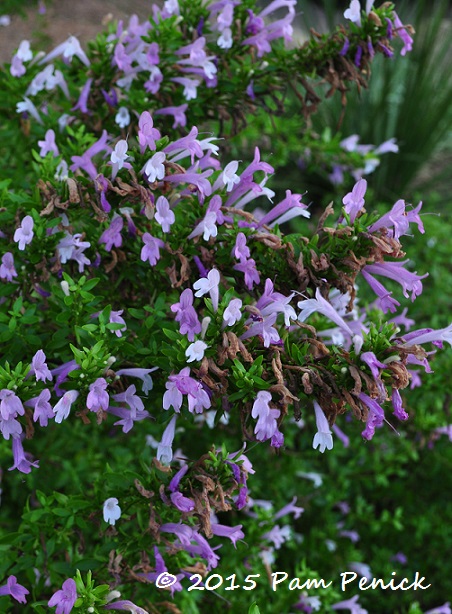
July 16, 2015 This month for Foliage Follow-Up I’m wearing my heart on my sleeve — well, on my garden anyway. This is one of my favorite combos in the front garden right now: feathery, chartreuse bamboo muhly grass (Muhlenbergia dumosa); spiky, star-shaped ‘Burgundy Ice’ dyckia; and lace-textured white skullcap ...
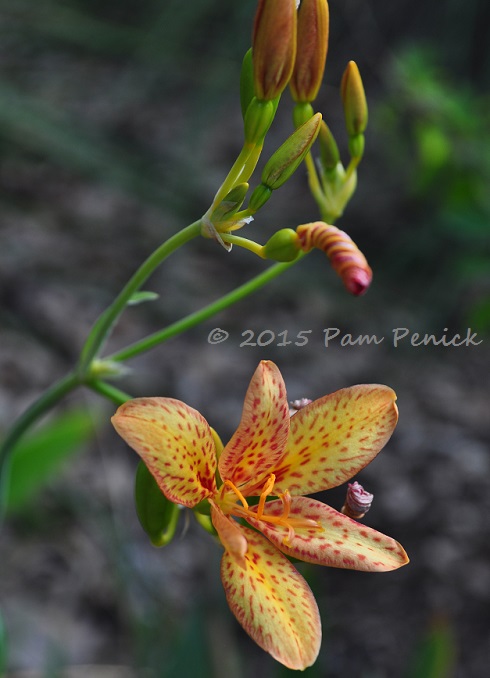
Candy lily crush
July 13, 2015 I’m sweet on you, candy lily (xPardancanda norrisii)! I’ve had this iris hybrid for a year, and it’s sweetening my summer garden with a daily unfurling of freckled flowers. The candy lilies in my front garden bloom better than those in the back thanks to a bit ...
Mexican oregano and a tall, dark, handsome partner
July 10, 2015 Each year I replant a purple fountain grass (Pennisetum setaceum) next to the Mexican oregano (Poliomintha longiflora) in the streetside garden. I love the rich color echo between the Mexican oregano’s lilac flowers and the grass’s dark leaves, which look good late-spring through fall and even, bleached ...
Fawn and games
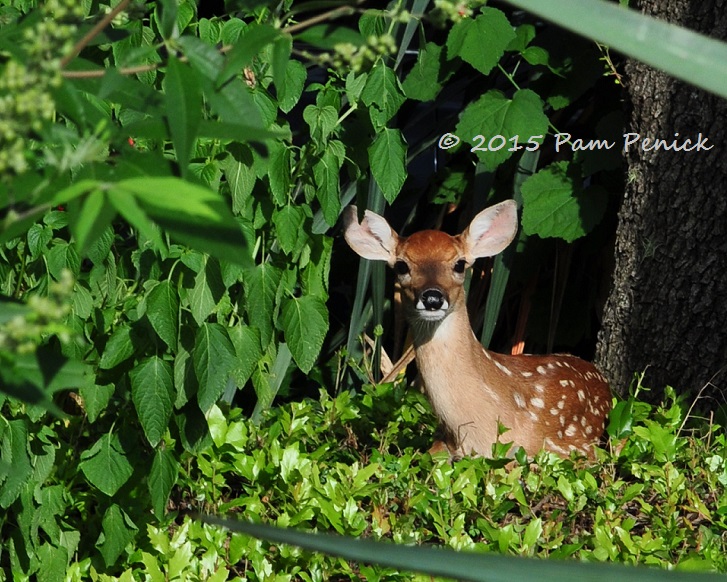
July 08, 2015 All this week we’ve had twin fawns hiding in various spots in the front garden while Mom eats the neighbors’ gardens browses all day. Yesterday I surprised them — or rather they surprised me and Cosmo. As Cosmo nosed around and suddenly sniffed them out, they startled ...
Crocosmia crush
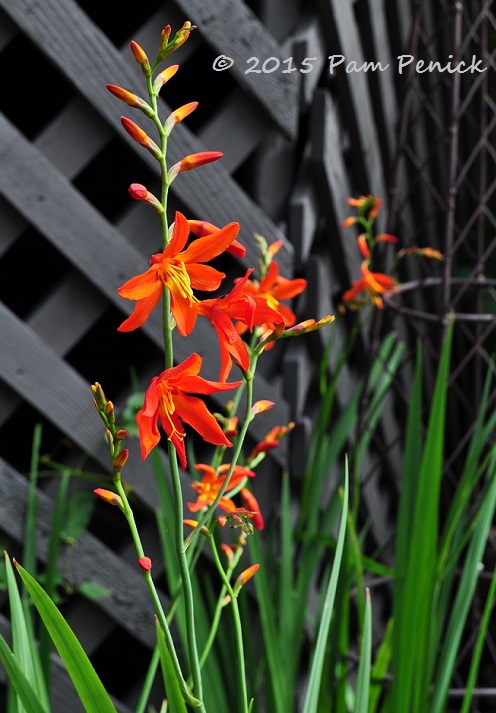
July 03, 2015 When I visited my friend Melody’s lovely San Antonio garden last fall, she gave me a division of a crocosmia. I was surprised to learn that crocosmia grows in central Texas, having seen it thriving in cool-summer gardens in Portland and Seattle. This isn’t the showy ‘Lucifer’, ...
Fawning over this garden visitor
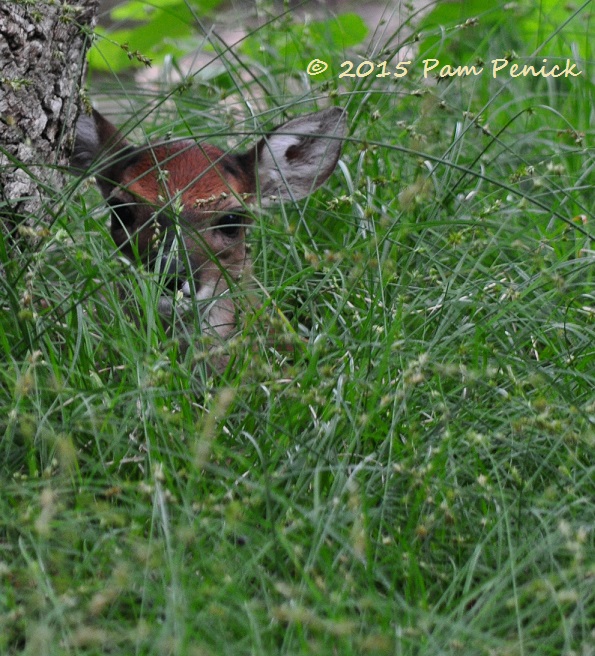
May 30, 2015 For two mornings in a row this tiny fawn lay curled in the shaggy sedge lawn, its back against a tree, waiting for its mother to return from grazing somewhere down the street. I walked right by it the first day, oblivious, and stopped to pull weeds ...