

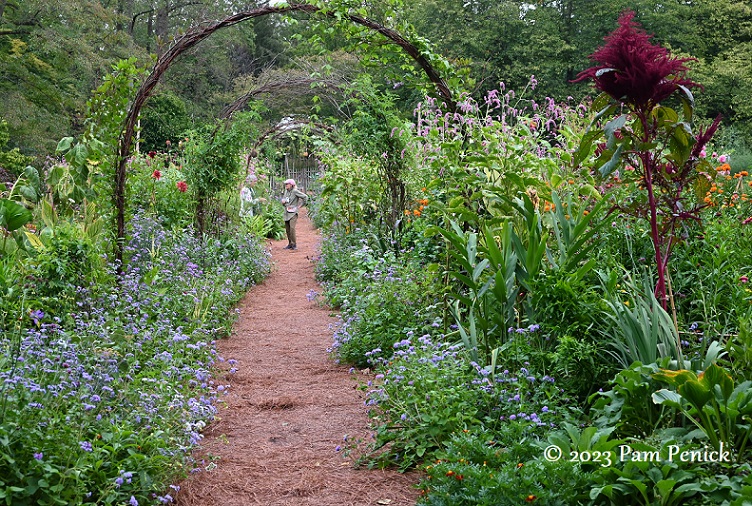
Cutting Garden and Fling Party at Chanticleer
January 24, 2024 Last September, the Philadelphia Area Fling took me to Pennsylvania, where I enjoyed two visits to the incomparable Chanticleer. I spent a full day there before the tour began and returned for the official afternoon visit, which ended with dinner, live music, and dancing in the garden ...
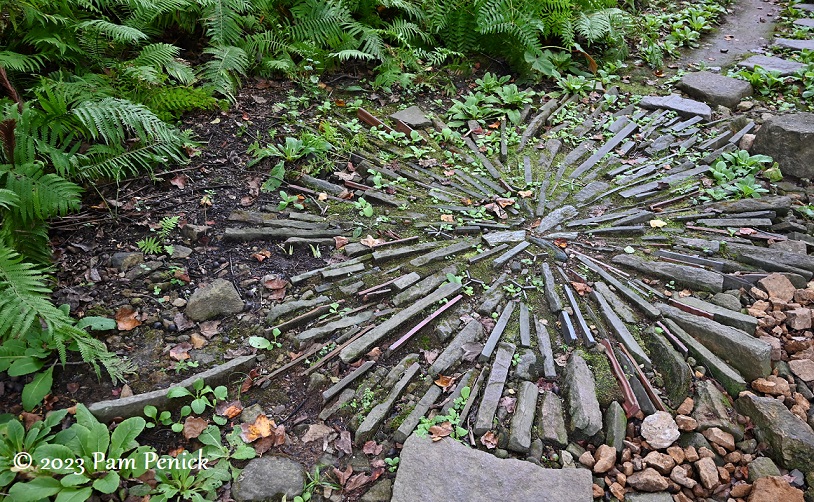
Ringing Bell’s Woodland at Chanticleer Garden
January 18, 2024 The most secret part of Chanticleer is the entrance to Bell’s Woodland, set off beyond the colorful cutting garden (coming up in my next post). The plant list for it is tucked inside a metal sculpture of a hornet’s nest hanging from a tree — worthy of ...
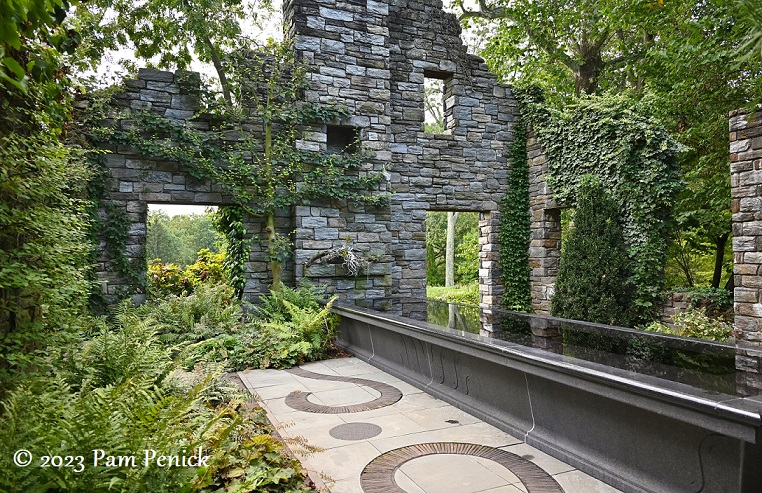
Falling into ruin at Chanticleer Garden
January 13, 2024 Chanticleer’s Ruin Garden has a fairy tale quality. It’s not an actual ruin but was built in 1999 on the site of one of the original houses on the property. Plants creep up crumbling walls and emerge from cracked paving, ghostly faces appear in pools of water, ...
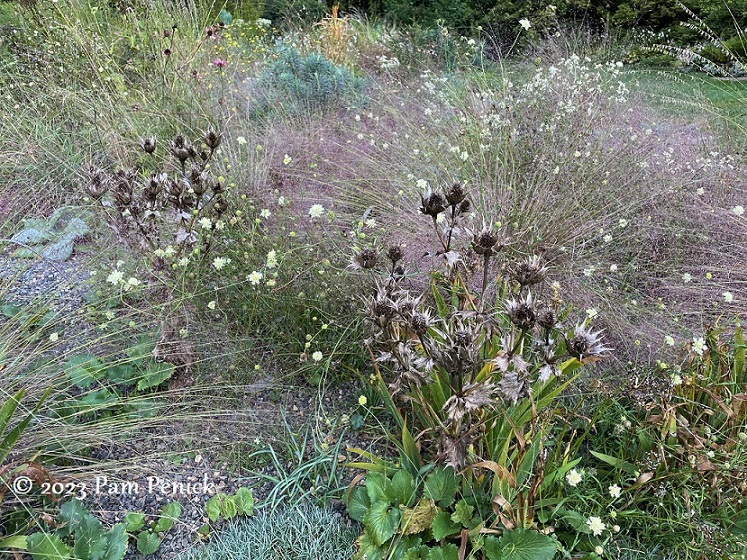
Rocking a dry garden at Chanticleer’s Gravel Garden
January 09, 2024 Every time I visit Chanticleer’s Gravel Garden, I get a familiar feeling. Many plants we grow in Central Texas appear in this Pennsylvania dry garden, and it’s fun to see them in a new context. Although the garden bristles with yuccas, agaves, and cactus and sways with ...
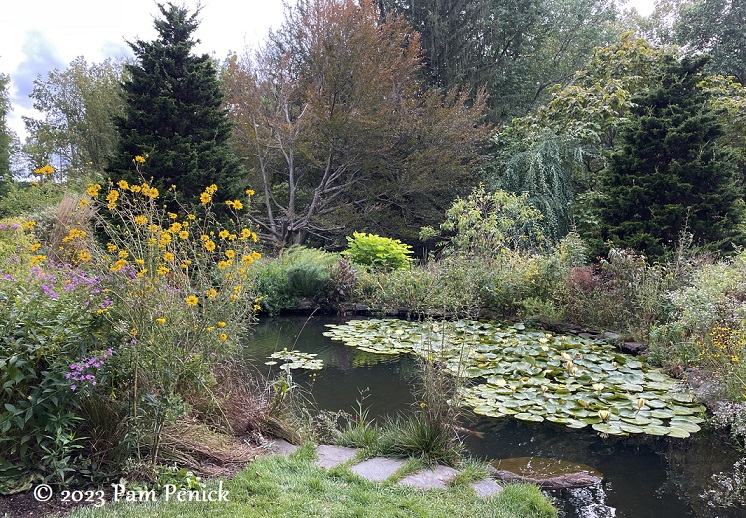
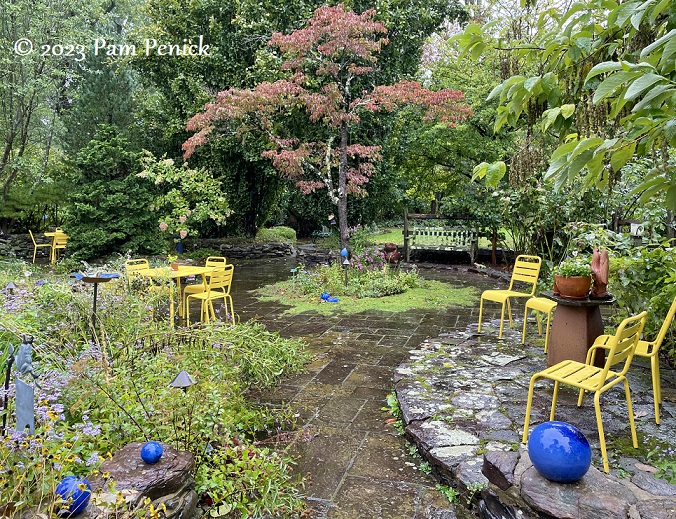
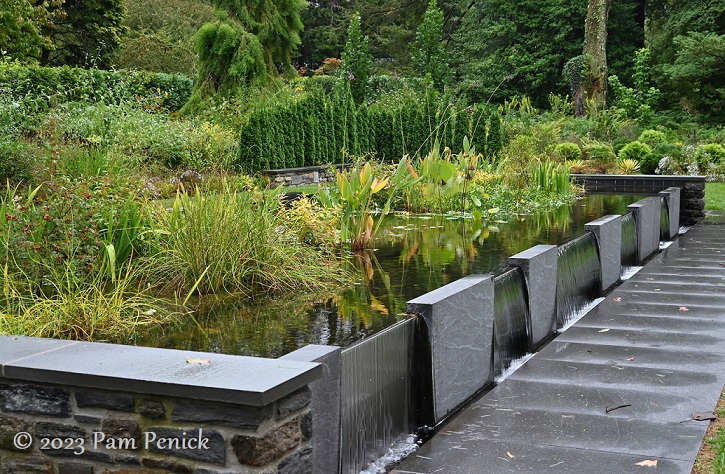
Wading into Chanticleer’s Pond Garden
January 05, 2024 The Pond Garden at Chanticleer draws visitors like a magnet. Water features always do. Five ponds surrounded by blousy gardens are found at the bottom of the long hillside that begins at the garden’s entrance. This is Part 6 of my visit to Chanticleer during the Philadelphia ...
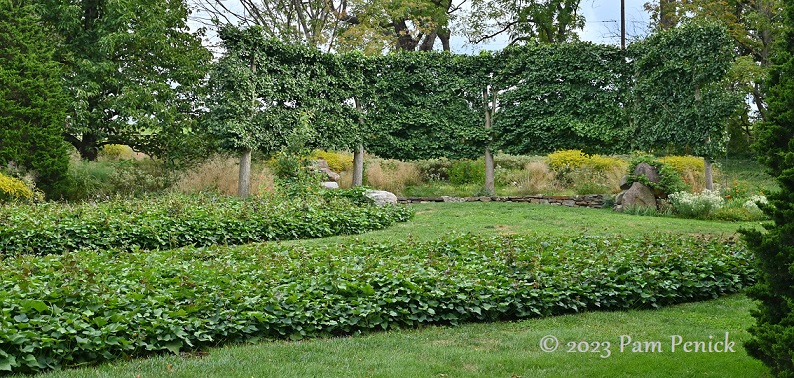
Exploring Chanticleer’s Elevated Walkway, Serpentine, and Bulb Meadow
January 03, 2024 Chanticleer Garden’s rooster theme continues with Marcia Donahue‘s cockscomb-bamboo sculptures, which mark the entrance to the Elevated Walkway garden. This is Part 4 of my visit to Chanticleer during the Philadelphia Area Fling last September. The winding pathway spirals around a big Japanese maple, which was blushing ...
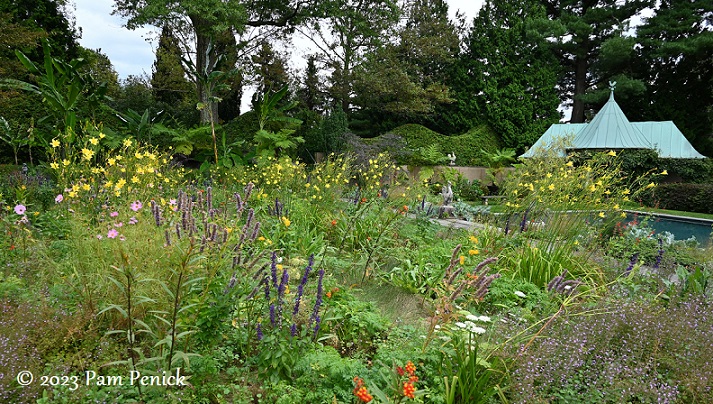
Chanticleer’s dreamy House Garden
January 01, 2024 Happy New Year! Let’s kick off 2024 with another post about glorious Chanticleer Garden, which I visited in late September during the Philadelphia Area Fling. Today I’ll show you the House Garden. Gravel Circle A rooster statue — the symbol of Chanticleer — greets you at the ...
Serving up Chanticleer’s Tennis Court Garden
December 30, 2023 Continuing my coverage of Chanticleer Garden, one of the stops on the Philadelphia Area Fling tour in September, I’m taking us today to the Tennis Court Garden. To enter, you descend a formal stone stair with planted-up handrails. I loved a previous iteration planted with fleshy mangaves ...
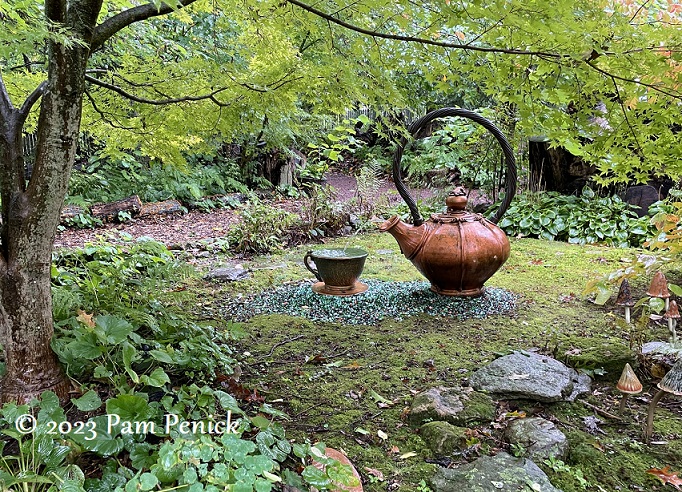
Chanticleer Garden is my cup o’ tea
December 29, 2023 The enchanting Chanticleer was worth two visits during September’s Philadelphia Area Fling tour. I flew in early from Texas in order to spend an entire day exploring Chanticleer, knowing I’d see it again for a few hours on Day 2 of the tour. More is more! This ...
Gardens for adventure, art, and games at Paxson Hill Farm
November 22, 2023 Picking up my tour of Paxson Hill Farm — from the Philadelphia Area Fling in September — where I left off yesterday, let’s keep exploring! After emerging from the hobbit house hideaway, I followed the path uphill through another weeping-tree arch. The romance! Am I right? The ...
Paxson Hill garden still gorgeous in the rain
November 21, 2023 On the final day of the Philadelphia Area Fling in late September, we stopped at Paxson Hill Farm in New Hope, Pennsylvania, to tour its marvelous garden behind the nursery. Even though Tropical Storm Ophelia had made garden-touring rather sodden (but still plenty fun!), I knew Paxson ...
From mill to Mill Fleurs, a garden of rare plants
November 09, 2023 I love a good play on words, and the garden of Barbara and Robert Tiffany employs two in its name. Mill Fleurs occupies the site where two old mills — from the 1700s! — perch along Tohickon Creek. Thirty years ago, the couple purchased the derelict structures, ...
Jenny Rose Carey’s playful garden rooms at Northview, part 2
November 06, 2023 In my last post I showed you half of Jenny Rose Carey’s garden, Northview, which I toured during the Philadelphia Area Fling in September. Today I’ll show you the rest. Let’s start with her Fruits and Flowers Garden, where this Tin Man sculpture greeted me with open ...
Jenny Rose Carey’s charming Northview Garden, part 1
November 05, 2023 It was a soggy late-September midday at the Philadelphia Area Fling when we visited author and horticulturist Jenny Rose Carey‘s garden, Northview Garden, in Montgomery County, Pennsylvania. My bus of 50 (garden bloggers, Instagrammers, and YouTubers) was invited first to have a sit-down lunch in the carriage ...
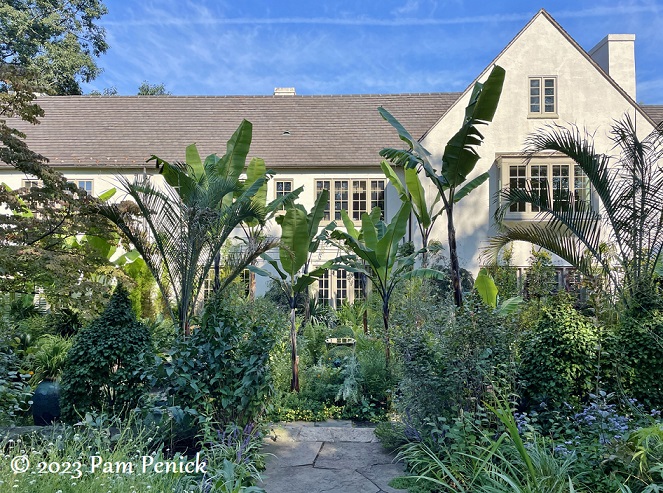
Stoneleigh native-plant estate garden and Flingers
November 02, 2023 Our banquet dinner at the Philadelphia Area Fling was held in the grand old Tudor Revival mansion at Stoneleigh: A Natural Garden, located in Villanova, Pennsylvania. Before dinner, we were set loose in the garden to explore for an hour. Let’s start with the house garden, where ...
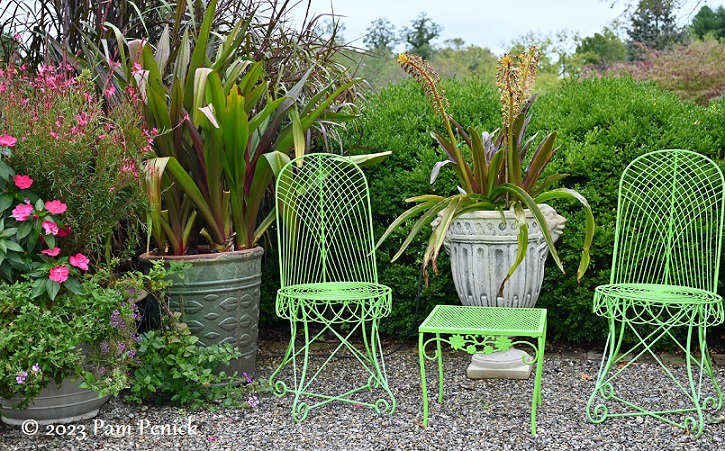
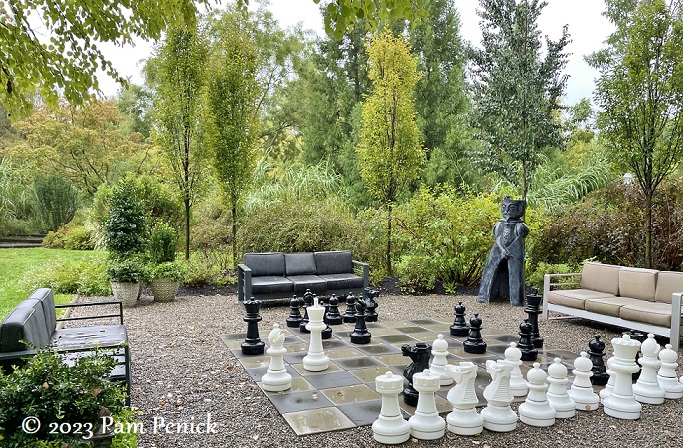
Tropical terraces, color, and meadow at Owl Creek Farm
October 30, 2023 One of my favorite private gardens at the Philadelphia Area Fling back in September was Steve and Ann Hutton’s Owl Creek Farm. It’s not really a farm, so far as I could tell. The Hutton garden is sizeable, though, and its rural setting in West Chester, Pennsylvania, ...